Ricoh GRD IV Focus Issue Report

Ricoh GRD IV focus issue fixed
- Difficulty: 7/10
If you're reading this, I assume you have a Ricoh GRD IV with a focus issue and some experience with electronics. If you don't have experience with taking apart or repairing electronics, I highly recommend finding someone knowledgeable to help.
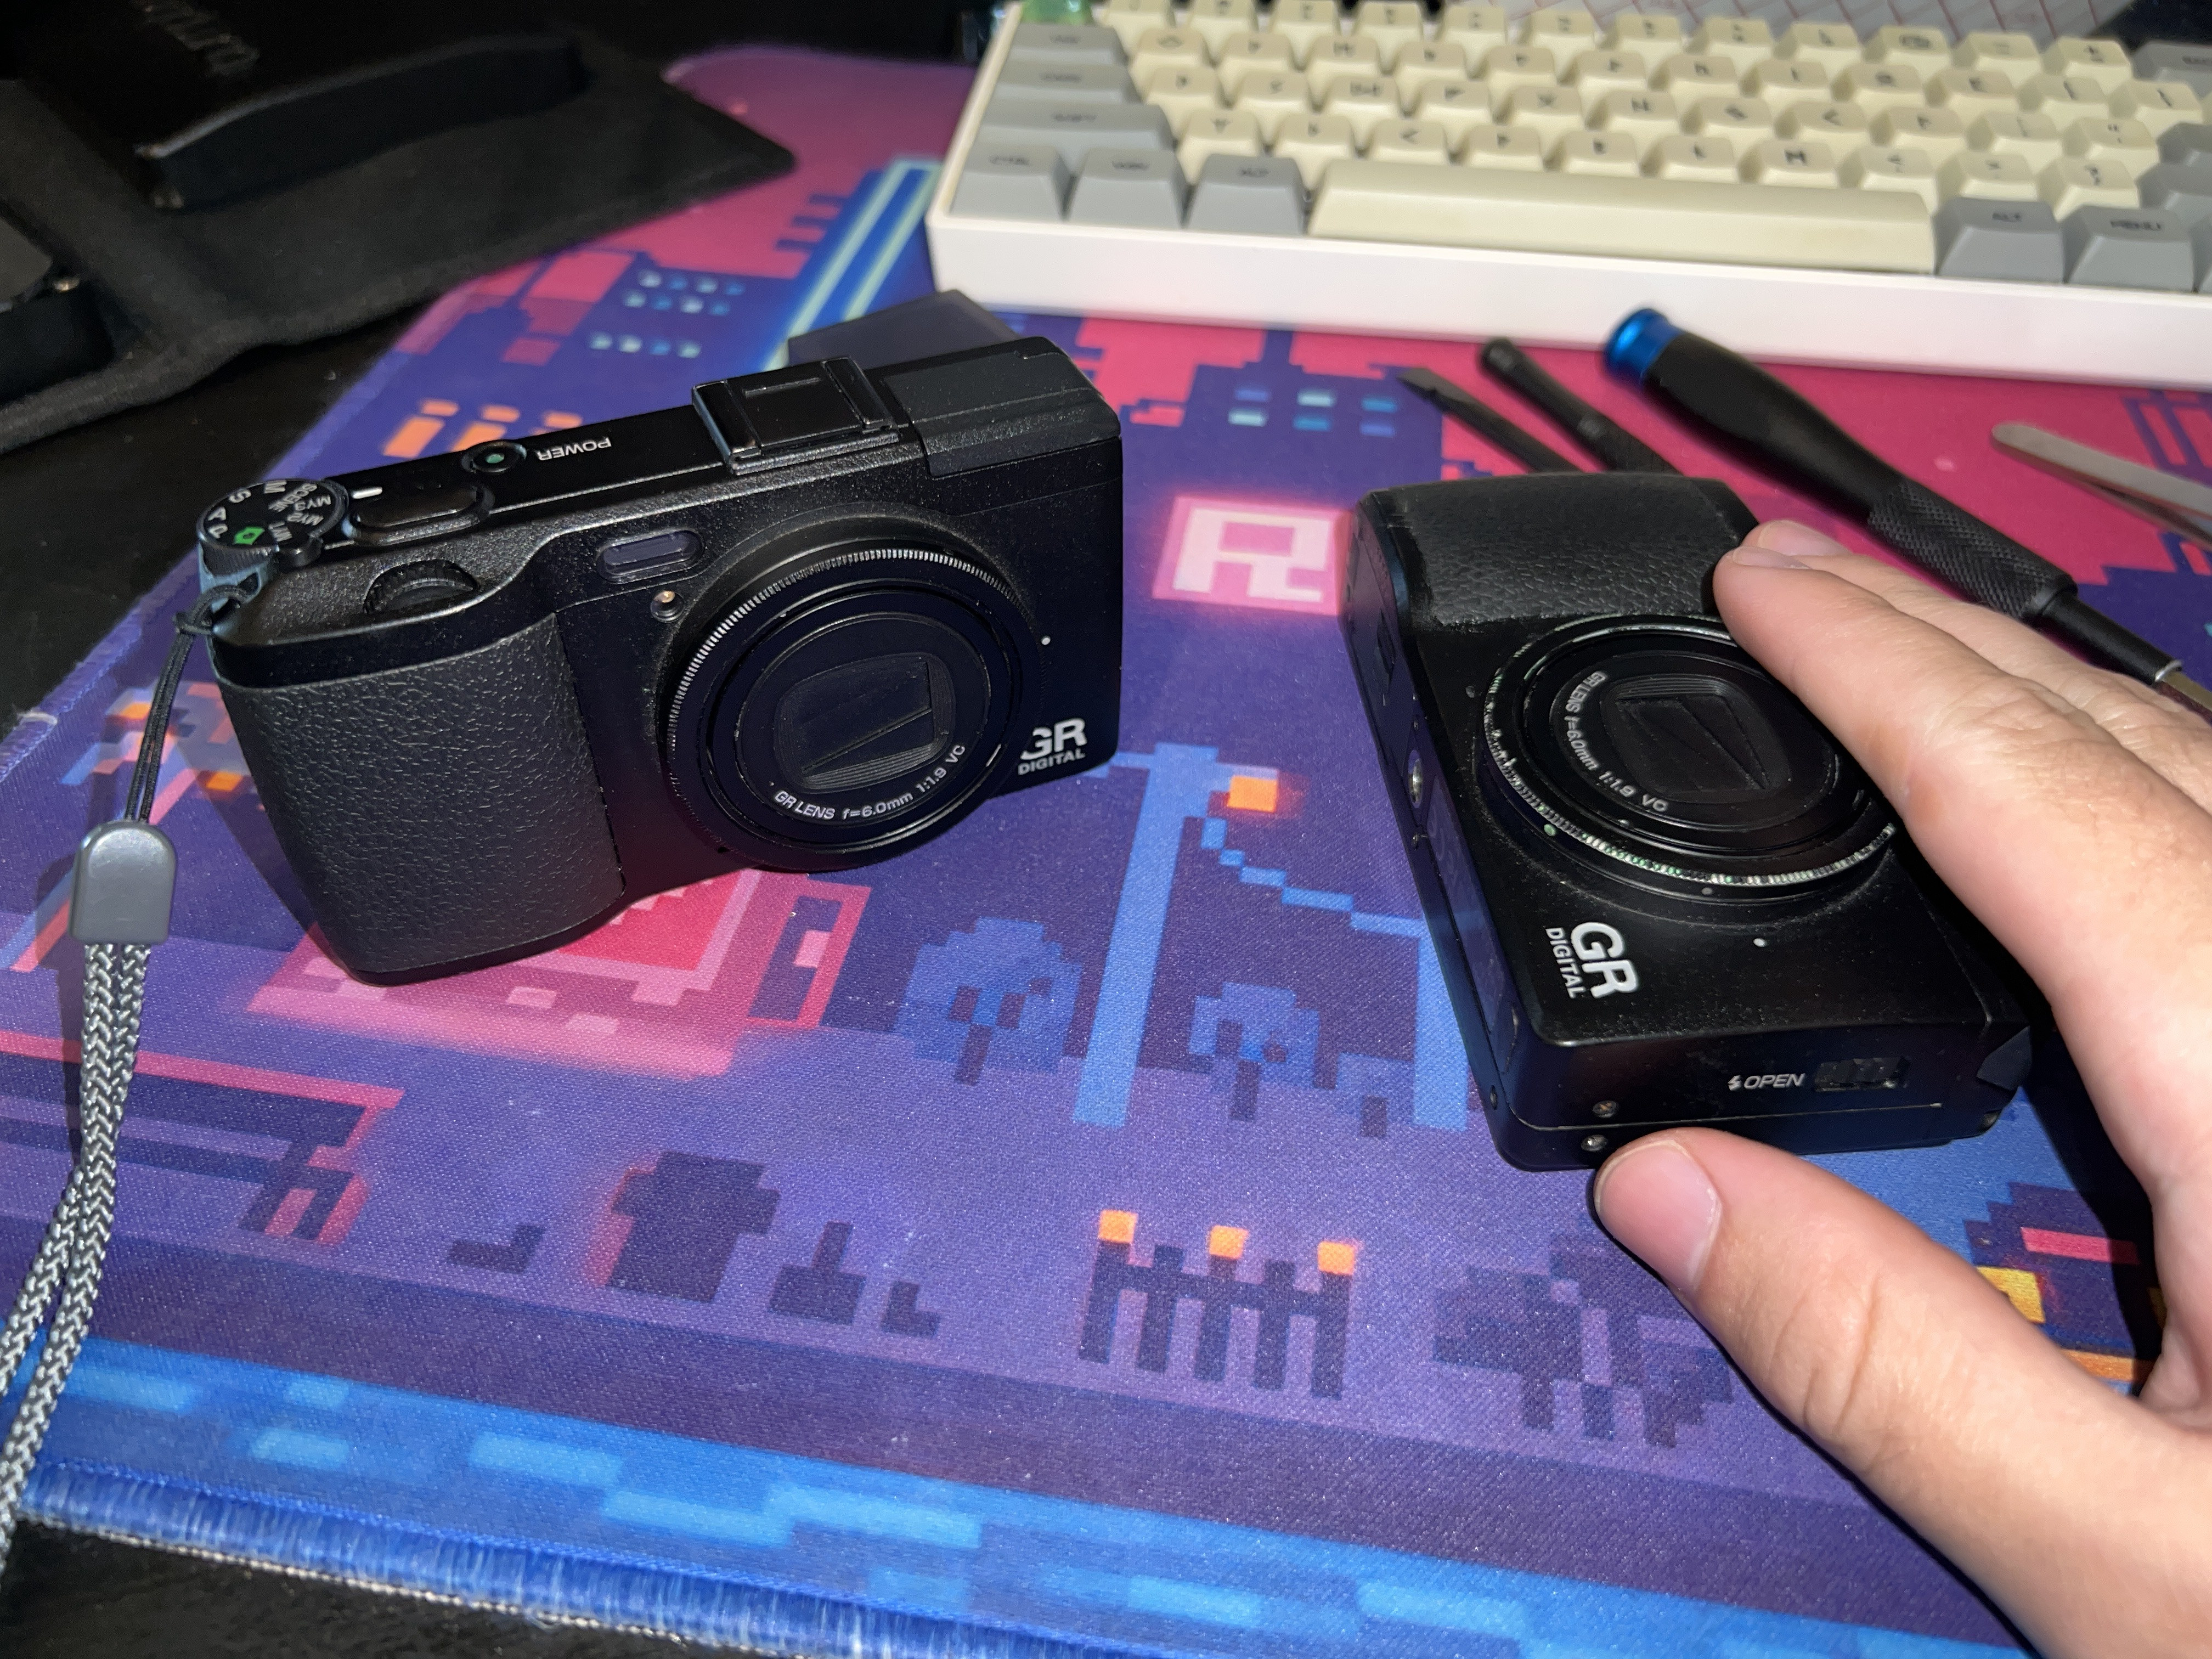
I got my first Ricoh GRD IV in July this year. I bought it on eBay at a reasonable price. When I received the camera, I played around with it for a bit until I noticed the images were blurry! This was disappointing, as I couldn't focus to infinity—only subjects about 8 feet or closer were in focus, while everything beyond was completely out of focus.
After some online research, I discovered that many users have experienced this issue since the camera's release in 2011. Users on older forums shared their experiences of sending it to Ricoh for repair, where it seems they replaced the entire lens/sensor module. Unfortunately, Ricoh no longer supports or sells parts for this camera, and there is little information available about its hardware specs.
Further digging led me to a blog called "The Amateur Engineer," where they discussed fixing the camera at home. This gave me a starting point for taking the camera apart and diagnosing the issue.
Read this blog BEFORE continuing with this one to gain understanding of the inside and how to take the camera apart, but come back before trying to mess with the sensor/ramp screws because you might be doing more than you need to.
My findings summary:
- Common issue with the camera, due to it being the first GR camera to include image stabilization.
- 3 possible ways to fix the issue - 2 very risky
- The stabilization works having the sensor attached to a frame that sits on top of 3 very small metal balls that are sitting on copper colored magnets beneath them. There are pieces of metal that are fitted in the frame that sit on top of the metal balls, this allows the metal balls to rotate freely, letting the sensor shift to stabilize the image. Those metal balls contribute to the distance of the sensor from the lens ALONG with the 3 plastic ramp screws you see on the corners. If any of these are missing or out of place, it is screwing up the focal plane, and all you need to do is reposition them to the factory default.
I will be using a junk ricoh grd iv in the images
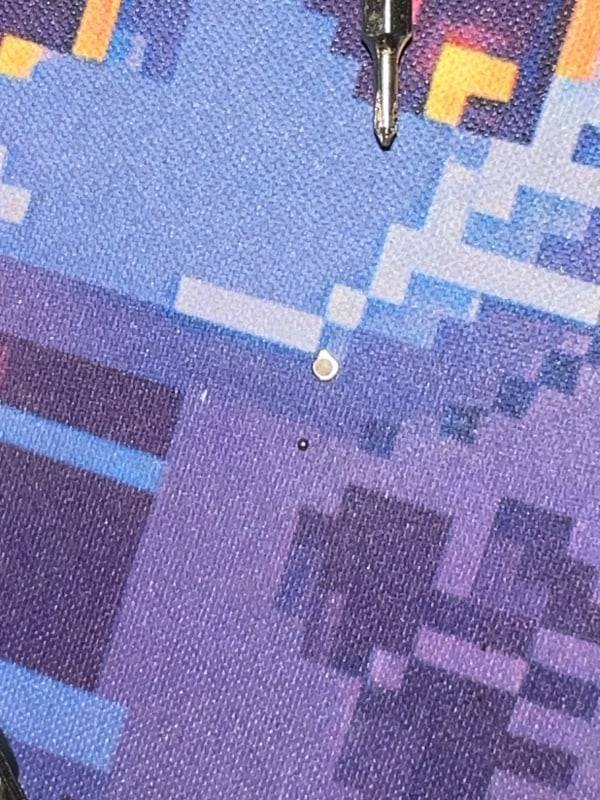
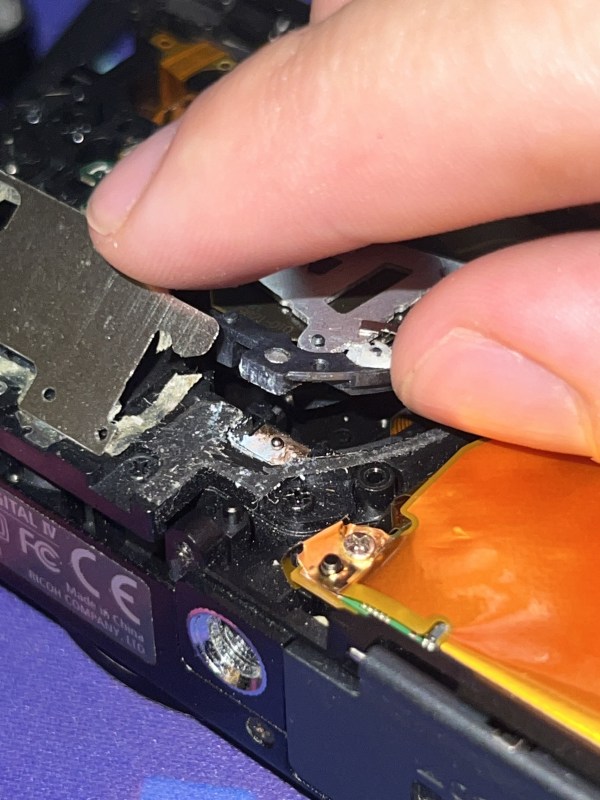
The First Possible Issue - The metal pieces are out of place.
As you can see in the image below - I am pointing at a pretty messed up metal piece that should look the same at the other two foggy-white circles, but it seems as if it's standing straight up and down in the hole. If this looks fine in your camera, you should double check that all 3 of the metal balls are in place, to test this, lightly push on one side of the image stabilization frame, if the other side tilts up significantly, then you are missing a metal ball or it is out of place. Continue with the next steps. If it is fine, then you can probably skip past this and go to the next solution.
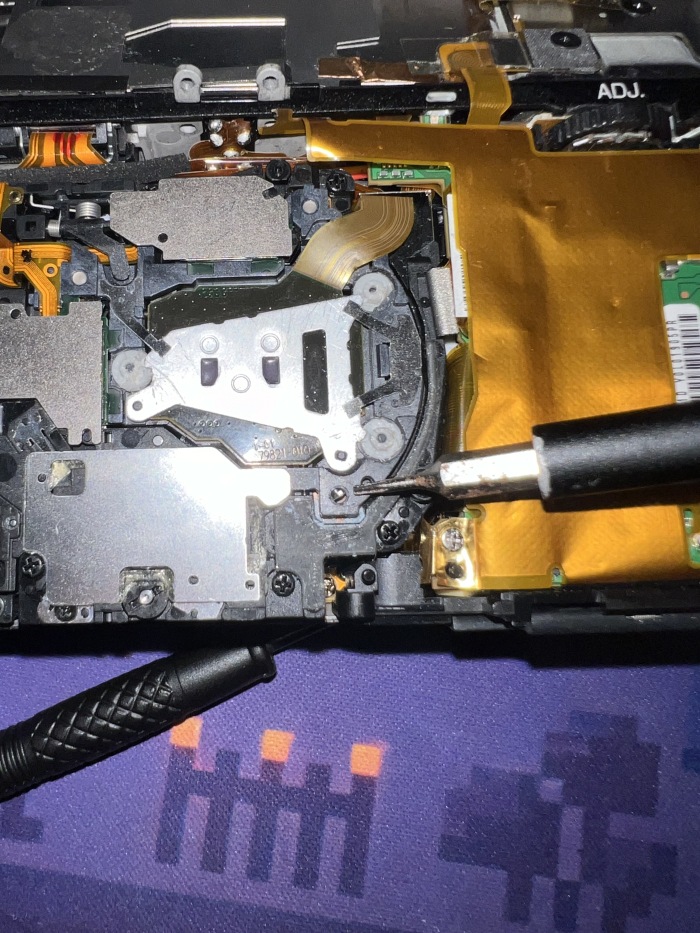
To get this fixed, let's start by removing these magnetically attached things that keep the frame from falling out of place/shifting the focal plane even more.
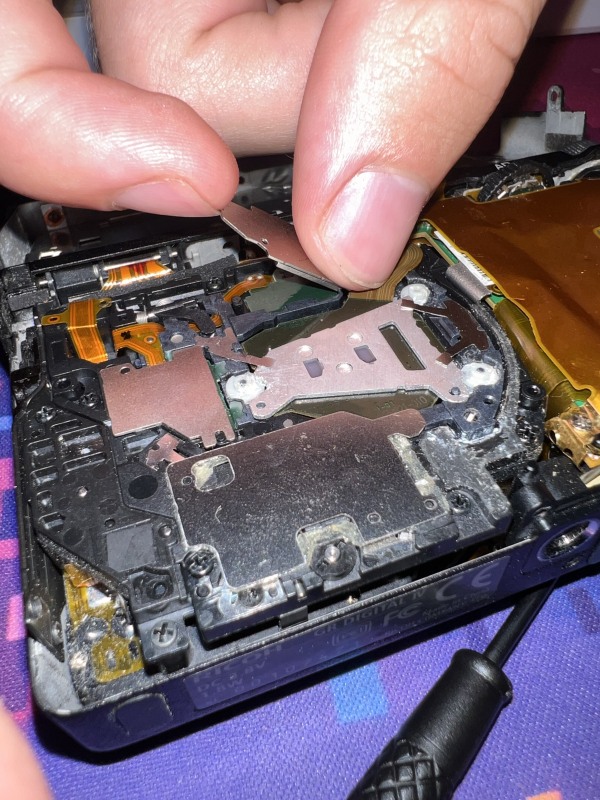 Plate 1
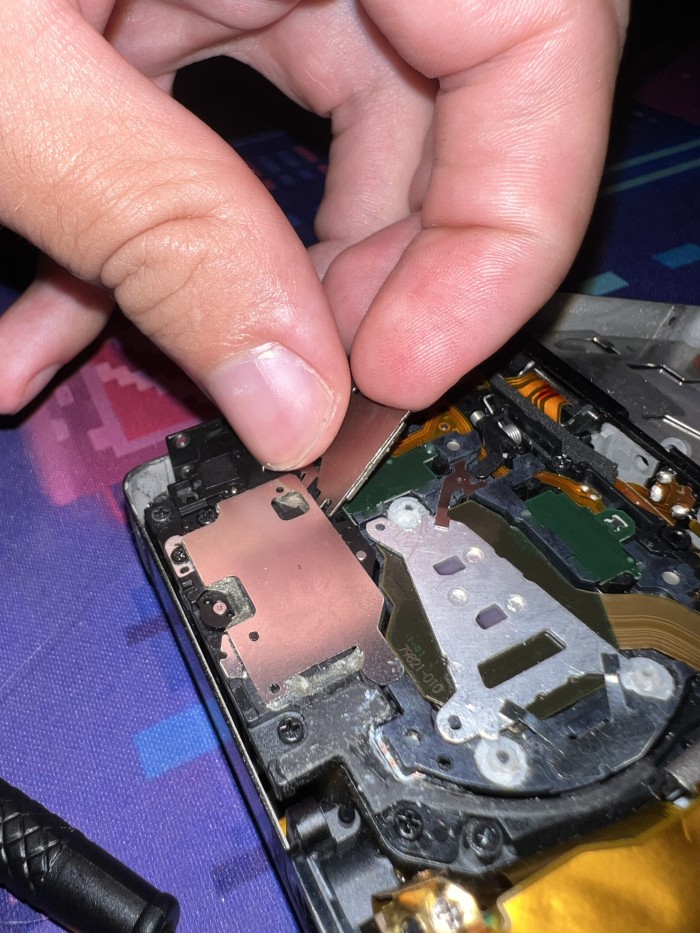 Plate 2
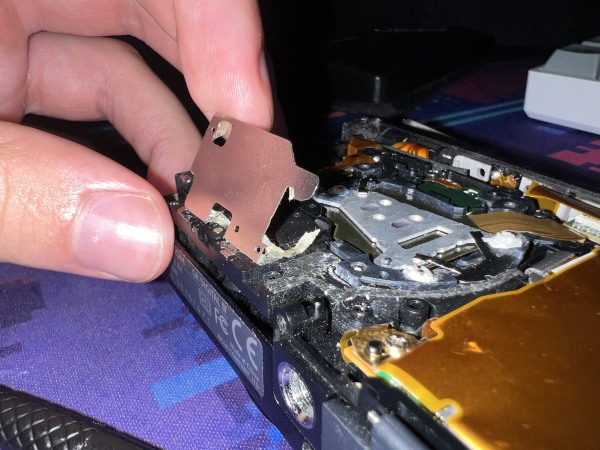 Plate 3
BE VERY CAREFUL DURING THESE NEXT STEPS!!!
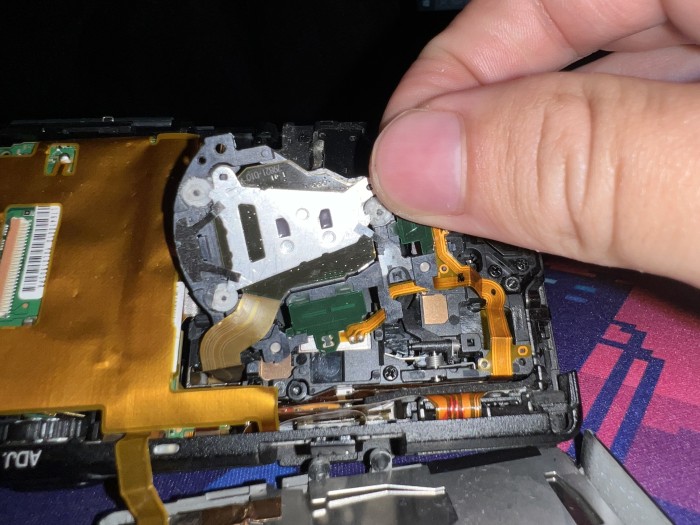 To lift the frame out of the lens module, make sure the top of the camera is facing you, then gently lift forward, then up. There is a spring lever holding out the bottom right side of the frame, once you get it out from underneath that, you can gently lift it out of place. Be very careful not to pull any more than necessary to avoid breaking the flex cables.
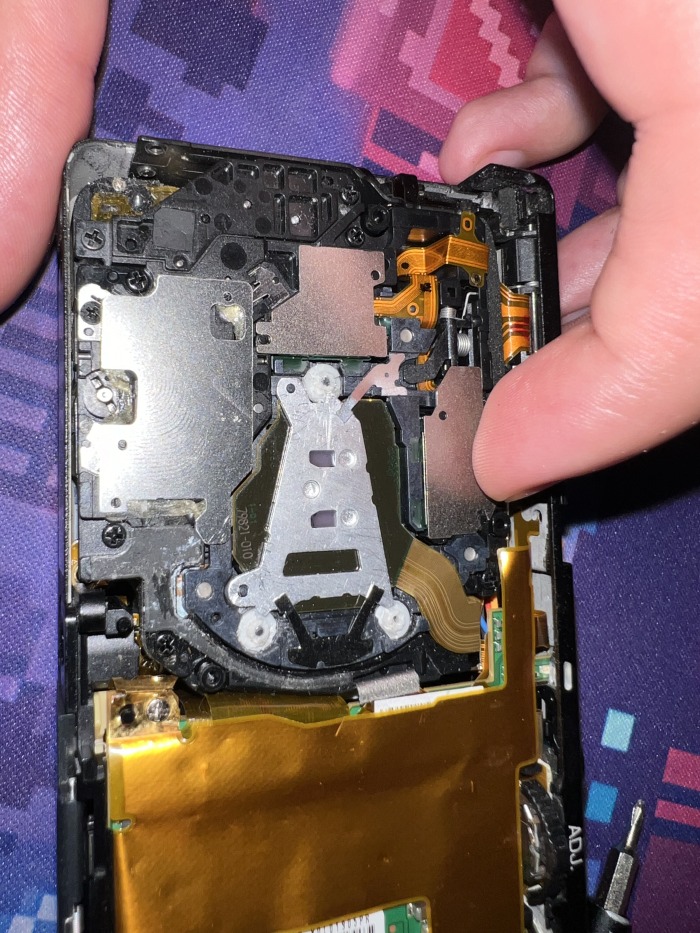
 Once you get the frame lifted out, you can then set the camera on its top, and carefully lay the frame down as shown in the photo to begin the work. You can see the square copper shaped plates on the lens module. The camera in the image does not have metal balls on them, but yours should. Make sure they stay there and be careful not to touch them or bump them as this can knock them off, and they are a pain to look for because they are so small.
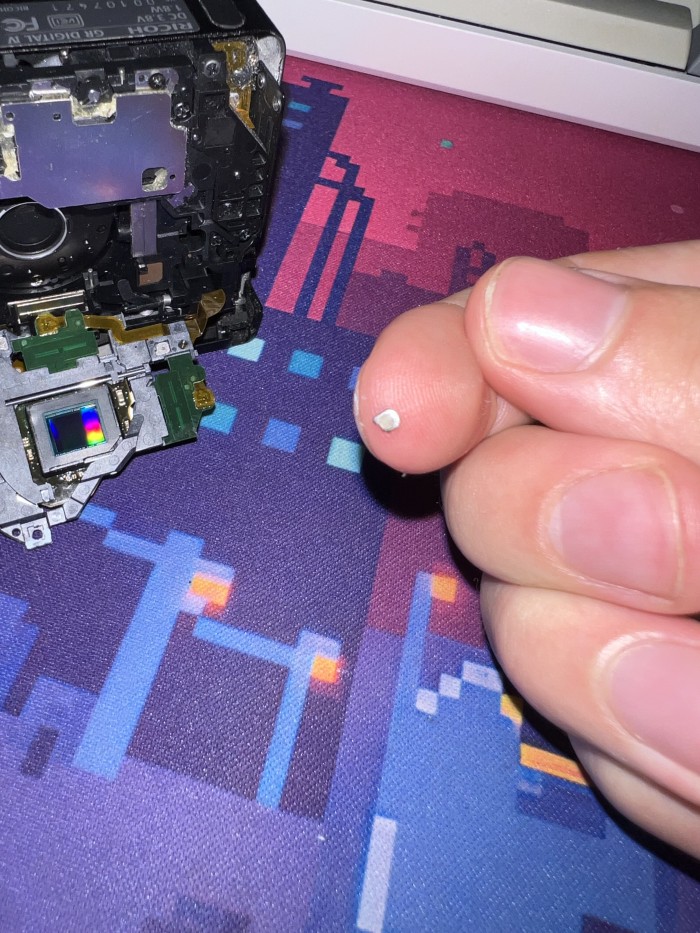
 Whichever side you were having trouble with, you should be able to see the small metal ball, and the plate that attaches to the frame. The plate should have a foggy textured dot on top. Grab only the plate with a magnetic screwdriver, and leave the ball on the copper plate.
 The plate that attaches to the frame (top) and the small metal ball (bottom).
 Place the plate on your finger as shown, you can see there is a pointy side, this needs to align with the space on the frame for it to fit at all.
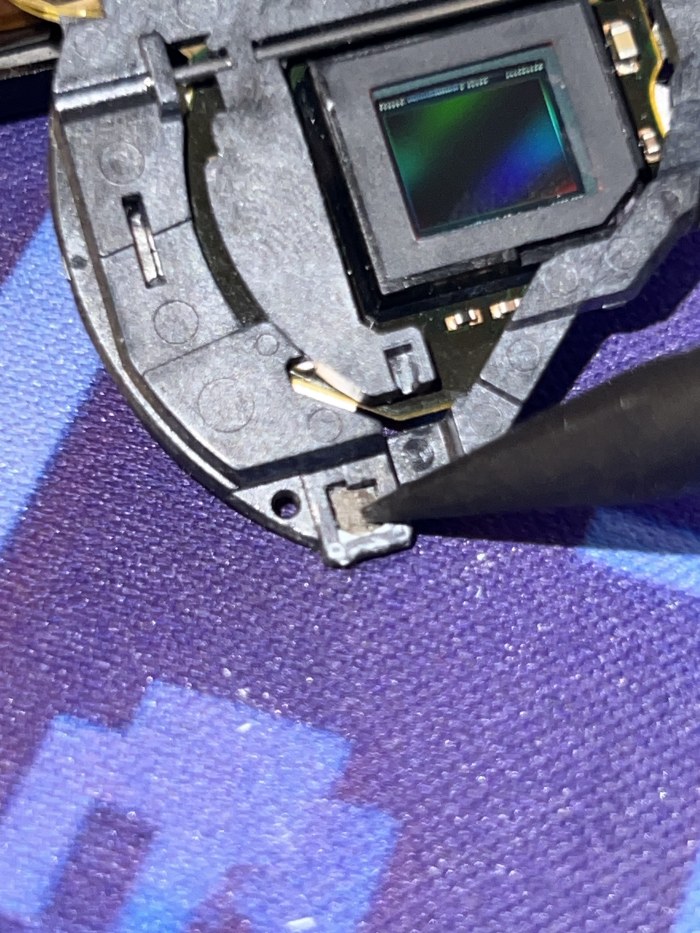 Place the plate in the hole as shown in the image, and push down firmly with a poker of some sort, this will assure the plate stays in place. Then double check the other two sides to make sure the plate and ball are in place for each one.
 Carefully lift the frame and start to place it back into place. You will need to get the spring lever back over the spot where it belongs. Be sure not to bend the spring more than necessary.
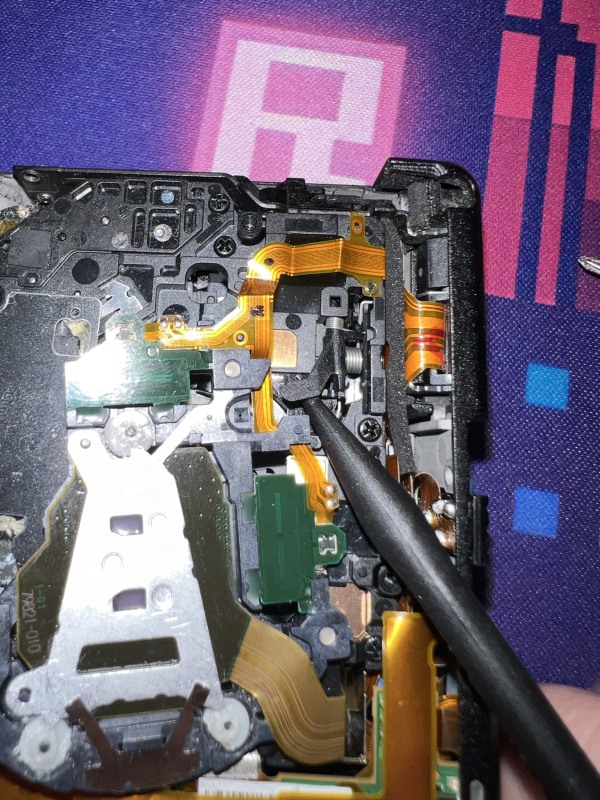
 Once you get the frame in a place you like, carefully tap the ribbon cable back into the hole where it was in the first place.
 TRIPLE check that the ball is in place, and the plate is still on the frame. You can see in the image that the foggy textured dot is sticking through the hole.
 Place the big plates back where they were, and your end result should look just as it was when you first saw it, except the image stabilization plate is correct this time. Make sure the sensor moves smooth and freely by moving it lightly with your finger. There should be no up/down movement if you press on any side of the sensor frame. You should only be able to wiggle it side to side.
When this is done, put the camera back together making sure to reconnect any loose flex cables, and see if the focus works! If you didn't mess with the ramp screws, the focus should be just as good as the day you got it.
The Second Possible Issue - Ramp Screw Adjustment
This method is the one that was tried on the junk camera I bought, as you could see in the images above. This involves removing the factory glue on each ramp screw and adjusting adjusting it until the focus is able to work correctly again. However, this is not ideal as the adjustments are calibrated so the hardware and software can work together with the auto focus, especially with snap focus. So before trying this method, try pressing with medium pressure on each of the 3 sides of the sensor frame to make sure there isn't a misalignment of some sort. If you want to go ahead with this method, be very careful removing the glue, and take your time. Use a specialized glue remover and apply it lightly over time while lightly wiping the glue away and picking any chunks. Be careful to not ruin any of the camera's insides by doing this, and be sure to not pick away at the plastic of the ramp screws, the glue and the plastic are very similar, and you could possibly disintegrate the plastic with the glue remover. Once the glue is removed and the ramp screws are turning freely, adjust them to multiple positions while frequently putting the camera back together or using an external display with the HDMI port and checking if you put the sensor in a good spot where it will focus. A tip that I have for you is to turn on the focus distance indicator setting, turning on Full Press Snap, and then choosing Spot focus for the default. This will let you set up the camera so you can make sure the focus distance indicator is showing the same distance while idle, and while half pressing the shutter button.
Example:
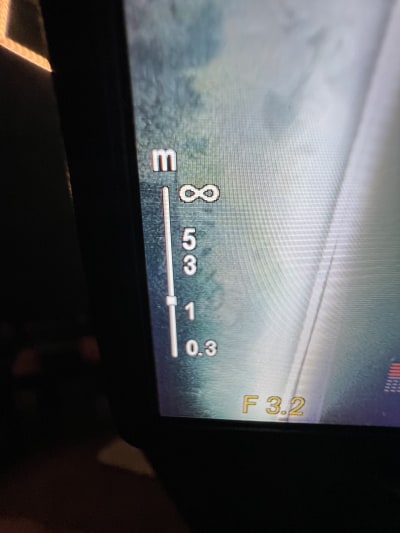 Idle snap focus distance on the indicator
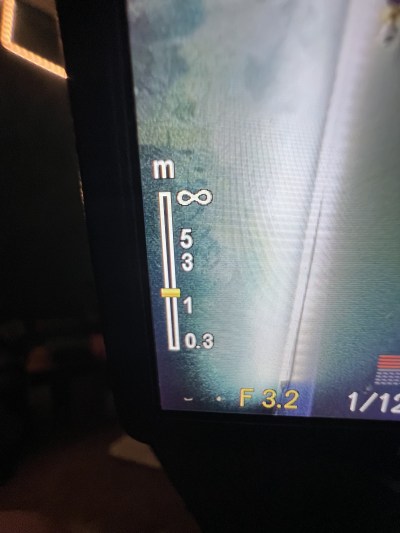 Half press focus distance on the indicator
As you can see, they are in the same position. However, this camera is old, so it might show different distances for each one, so half press a few times and average it out in your head to determine. If it's way off, it will be showing the indicator at 0.3 meters or infinity every time, no matter what the snap distance is saying.
Why are we doing this? We are aligning these two indicators because the Snap focus distance is coming from the sensor on the outside of the camera, while the Spot focus distance is determined by contrast (I'm pretty sure). Matching them allows for you to use Spot focus reliable while also being able to nail focus on Snap focus images. Many people just set the ramp screws to the lowest position - do not do this, you will not be able to use snap focus and it will distort your images since the sensor is so close to the lens.
Another way to tell if it's off is to try and focus on something on your desk from where you're sitting, if it can't focus on it, then you need to readjust the screws. You should be able to focus on objects a bit closer than 0.3 meters and beyond without the need for macro mode.
This process uses a bit of trial and error, you can determine where the sweet spot is for each screw by looking at how out of focus each side of an image is, then turn it right or left depending on that. Try to use a wall with art work or objects covering it, and point the camera straight on at 1.5 meters away and use half press and snap focus and compare the two images. Since the sensor is so small, the images should look absolutely identical to each other in terms of sharpness of objects on the wall in each corner/side of the image. Yes we are pixel peeping on a 13 year old point and shoot.
For the perfectionist - images where the Snap Focus one is more hazy and/or blurry than the Spot focus image, the ramp screw(s) aligning to the corner of the image you see it on need to be adjusted slightly depending on how bad it is. Once the Spot focus image and Snap focus image look the same in terms of sharpness, then you can seal that bad boy up and start shooting with it again!
This method takes a while with the constant adjusting and checking of the position of the ramp screws, but it should work if nothing else.
Third Possible Issue: Broken Lens Module
This is as described - if nothing else works, this might be what happened with your camera. My solution to this would be to either buy a new one, or take a risk on a junk Ricoh GRD IV on eBay for cheap, and use the lens module from that camera in your current one.
I hope this blog helps somebody who is struggling with their new or old camera. I will be updating this blog with new findings and casual edits as time goes on. So check back frequently to see if I made any changes! Check on the other blog I linked earlier for discussions and other possible solutions. Thank you for reading, and I hope you were able to fix your camera. Happy shooting!